Friday, December 31, 2010

Nest Eggs

Don't forget to enter the Kim Chee Casserole 100 Posts contest!

Nest eggs, eggs in a basket, bird's nest, cowboy eggs, eggs in a hole...whatever you call it, this egg-and-toast combination is a tasty meal that's easy to make.

It starts with a slice of bread. Use a biscuit cutter, cup, or tin can to cut a hole in the middle of the bread.

Now cut a piece of butter and melt it in a frying pan. Toss in your bread.

When the bread is a light golden brown, flip it over. Don't get it too dark, but do get some color on it.

Crack an egg into a small dish (or, if you're feeling brave, crack the egg right into the toast hole.)

Carefully pour the egg into the toast.

If you're not fond of runny yolks, scramble your egg first.

Don't forget to salt and pepper. I like to make sure to salt the bread, too.
Let your egg set. Once the bottom is well set and the toast is golden brown, carefully flip the toast over and let the egg cook on the other side.

Don't throw away your bread centers! I like to toast them in the pan too. They're perfect for sopping up the runny yolk--that is, if you like runny eggs.


Enjoy the crispness of the bread, the saltiness of the butter, and the creamy texture of the egg. Make Nest Eggs a weekly tradition!


Recipe: Nest Eggs

1 slice white bread
1 egg
1 tbsp butter.
salt and pepper, to taste

Using a biscuit cutter, cookie cutter, glass, etc., cut the center out of the white bread.

Melt butter in a nonstick pan over medium heat. Add bread and lightly toast one side.

Flip the bread over and crack egg into the bread hole. Salt and pepper to taste.

When egg is set, gently flip egg-and-toast. Cook until just set (longer if a set yolk is desired.) Remove from heat.

Toast the toast round until golden brown. Serve with egg-and-toast.

Wednesday, December 29, 2010

100th Post!! ...and croissants

Wow, who knew Kim Chee Casserole would make it to 100 posts? I'm just as amazed as you are!

To celebrate both my 100th post as well as the New Year, I think it's time for another contest, don't you think?

To enter, just leave an answer to the question below in the "Comments" section of this post:

What was your favorite recipe posted on Kim Chee Casserole in 2010? 

But wait! That's not all! To make this a little more exciting, why not get your friends involved too? Get a buddy to enter the contest and also mention your name, and for each person you get to enter, that will be another entry for you! For example, you get your BFF Trish to enter. She mentions your name in her comment. That means she's entered the contest, and she's also given you an extra chance to win!

Be sure your friend mentions your name in their comment or I won't know who to credit (for example, "Beth told me to enter! We made Pink-Sanded Sugar Cookies together, which was my favorite recipe!")

You can only leave one answer per person, but there's no limit on how many other people you can get to enter the contest. Got fifty friends? If you get them all to enter, that's fifty extra chances for you right there!

Now on to the prize! I'm feeling a bit nostalgic. When I was little, every Sunday we would go to the bakery at the Kahler Hotel (which no longer exists--the bakery that is, not the hotel) and have croissants. If we got there at the right time, the croissants would be warm, and the chocolate in the middle would be just a little gooey. I've been missing those croissants.

So, in honor of that, the winner, chosen completely at random, will receive 15 frozen croissants (or 24 mini croissants) in the mail from Williams-Sonoma! Made by pastry chef Jean-Yves Charon, these croissants are nothing but delicious. The winner will be able to choose from one of the flavors below:

Croissants!

Chocolate croissants!

Chocolate chocolate croissants!

Mini croissants!


The contest will close on Wednesday, January 5, at noon CST. The winner will be announced that evening. Go find your friends and good luck!!

Monday, December 27, 2010

Pumpkin Bread


I like to make pumpkin bread the minute the weather starts changing. There's nothing like waking up to a hot cup of coffee and a thick slice of pumpkin bread. 

 To begin making your own pumpkin bread, you'll need a big ol' bowl and some sugar. Brown and white, to be exact.

Next is a cup of oil. I've really got to buy myself some new measuring cups, or at least get a Sharpie out and re-mark all the lines.

Give the sugar and the oil a nice stir and then crack four eggs. It seems like a lot, and, well, it is. This recipe makes a lot of pumpkin bread.

Add the eggs, one at a time, mixing well after each addition.

Next is some milk, just to thin things out a little.

Here's what makes this bread pumpkin bread.

I do enjoy canned pumpkin. It's so easy and convenient and consistent. I've noticed that the consistency differs between the brands, however. Libby's is very dense, while Festal and Farmer's Market Organic are less firm but have a richer smell. I was a little distressed this fall when canned pumpkin became hard to find (apparently the pumpkin harvest last year did not go well). Apparently cans of Libby's were selling on eBay for $6 to $7 apiece! How crazy.

Anyhow. After your pumpkin is mixed in, you'll need to season it. I used cinnamon, cloves, allspice, and ginger.
Stir your spices in and then get ready for a flour-y mess as you add the dry ingredients--four, baking soda, baking powder, and salt. I try to add them in several additions to avoid white-out conditions in my kitchen.

I like to add some variables, so I threw in some walnuts. I've used pecans and dried cranberries before with great success.

Here's a tip--save the last half-cup of flour and add it the same time as the walnuts. The flour will coat the walnuts and will help keep the nuts from sinking to the bottom of your bread.

Now carefully pour your batter into your cake pans. Today I made two very large loaves, but I've also made them in mini loaf pans (I believe this recipe makes 6 or 8.)

Be sure to grease your pans well, so your loaves have no trouble coming out later.

Bake until a toothpick inserted in the middle of the bread comes out clean.

Another note--I used a metal loaf pan and a silicone loaf pan. I've noticed that the silicone always takes a little longer to bake. I suppose because the silicone doesn't retain heat like the metal. Just an observation.


Let your bread cool fully and then turn them out of their pans. Slice and enjoy! If you're planning on freezing your bread, wrap it well in cling wrap or press and seal wrap, and then again in tinfoil. It freezes amazingly well!


Recipe: Pumpkin Bread

1 1/2 c. white sugar
1 1/2 c. brown sugar
1 c. vegetable oil
4 eggs
2/3 c. milk
1 can pumpkin
2 1/2 tsp. ginger
1 12 tsp. cinnamon
1 tsp. allspice
3/4 tsp. cloves

3 1/2 c. flour
2 tsp. baking soda
2 tsp. salt
1/2 tsp. baking powder


Preheat oven to 350F.

In a large mixing bowl, combine sugars and oil.

Add eggs, one at a time, mixing well after each addition.

Add milk, stirring well.

Add pumpkin, stirring well.

Add spices, stirring well.

Add flour, baking soda, salt, and baking powder in three additions, stirring gently after each addition.

Stir in nuts, if desired.

Pour into well-greased loaf pans and bake for 1 hour (mini loaf pans may take less time). Let cool completely before turning the bread out of pans. Store at room temperature or freeze.

Friday, December 24, 2010

Chocolate Christmas Truffles

Chocolate truffles are so delicious and easy to make. And they are something that I've never seen recreated well in a store-bought product. You can flavor them any number of ways, with extracts or liquer, different chocolate types, and different coverings such as tempered chocolate, candy melts, nuts, sugars, and powders. You can get a thousand different types of truffles from just one basic recipe. They're fun to eat, beautiful to give as gifts, and require only a few simple ingredients.

I used all semi-sweet chocolate today because that's what was in my kitchen. And I flavored them with DiSaronno because I had just a little bit left.

Break up your chocolate bar into small pieces. It always makes me a little sad to break such a pretty piece of chocolate--although I do like that nice snap it makes.

Pour your chocolate chips on top. You'll need almost a bag and a half.

Now pour your cream into the bowl.

Top it off with a pat of butter.

Now you'll want to melt everything together. You could put your bowl over a pot of boiling water, or you could gently heat things together in the microwave. I chose the microwave route--30 seconds, stir, 30 seconds, stir, etc., until the chocolate was fully melted. The stirring is important--it keeps your chocolate from burning.

Once your chocolate is melted, you can add in your flavorings. Here's the amaretto liquer.

I also added a little vanilla--there wasn't quite as much amaretto as I thought there was. Otherwise I would have just added the liquer.

Is it weird if I want to take a swim in this?

Now pop your bowl in the fridge or freezer for a while. You want to firm it up so it's hard enough to roll into balls. Keep an eye on it--it gets hard to manage if you let it get too cold.

Here's what it looks like after about an hour. An hour firmed the top half enough to roll, but then I had to put the bowl back in the fridge to cool the bottom half. I'm impatient like that.

To roll out your truffles, just scoop out a small chunk o' chocolate. You don't want them to be too large--they're pretty rich.

Gently roll them between your hands. Don't worry if they're not perfect. They'll just resemble their namesake more closely. And things will only get more messy the longer you try for perfection.

To keep things a little clean, I cover my cookie sheet or plate or whatever I plan on setting the truffles on with some parchment paper. Pop them back in the fridge to cool down again.

I rolled my truffles in cocoa powder, but you could use nuts, sprinkles, powdered sugar, or a chocolate or candy coating instead.
What I like to do with the cocoa powder is push all the powder to one side of the bowl or plate.

I roll the truffle around in the powder, and then give the truffle a couple short drops or taps on the side of the bowl with no powder. This shakes off all the excess. See that ring around the truffle? That just one tap from that one truffle.

Little paper cups gift the truffles somewhere flat to hang out. I store them in a cookie tin with a tightly fitting lid.


Give these truffles as a gift or keep them around the house for a decadent snack. Store them in the freezer and they'll keep for months--that is, if they last that long!


Recipe: Chocolate Christmas Truffles

1 c. heavy cream
4 oz. unsweetened, semi-sweet, bittersweet, or dark chocolate
2 3/4 c. semi-sweet chips
2 tbsp. butter
1 shot liquer
1 tsp. vanilla

coating of your choice


Melt cream, chocolate, chips, and butter together in a bowl. Add liquer and vanilla. Store in the fridge or freezer to let the mixture firm up.

Once mixture has hardened (~2 hours), roll into bite-sized truffles. Place on a cookie sheet or plate. Once all truffles are rolled out, return them to the fridge.

Roll cooled truffles in whatever coating you choose (tempered chocolate or candy melts, nuts, sprinkles, etc.) Store in a cool place.


Posts will resume on Monday, December 27. Have a merry Christmas or an otherwise happy holiday!

Thursday, December 23, 2010

Christmas Week, Post 4


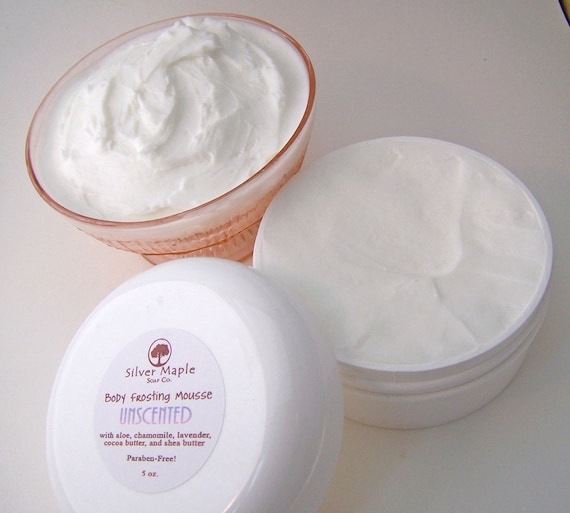
Today's holiday gift idea is something scented from Silver Maple Soap Co. in Marcus, Iowa. I've ordered from them in the past and have been nothing but pleased with their product.

I love their body butter and am looking forward to trying the body frosting mousse.

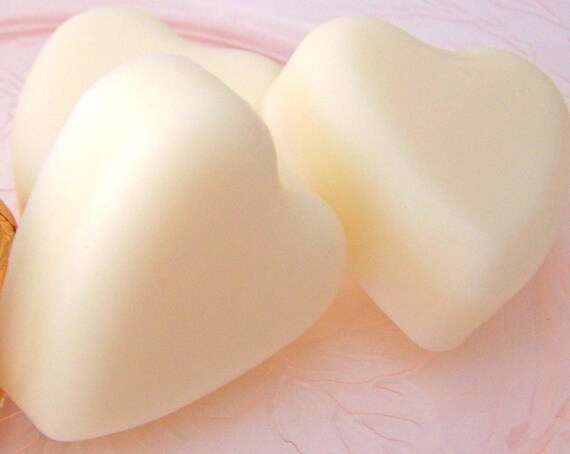
I hear Santa is bringing me some massage melts.
And pssst! I got Mr. Kim Chee a bar of beer soap. I bought him a bar of stout soap, but pictured is the honey wheat.


Shipping is quick and very reasonably priced. And there's the option to choose your own scents! There are dozens of scents available, including cherry almond, sparkling green tea, pink sugar, and mango sorbet. There are even scents for men, like Cary Grant, sweet pipe tobacco, and vanilla sandalwood. The soaps are made the old-fashioned way, and out of natural ingredients.

Give these wonderful soaps a try! Your feet, hands, body, and Christmas giftees will thank you!

Wednesday, December 22, 2010

Cream Cheese Cresent Roll-Ups

By request, here's my easy recipe for Cream Cheese Cresent Roll-Ups. Super easy, fairly fast, and always delicious.

Start things rolling with half a package (or one of those small packages) of cream cheese. It should be room temperature or things are going to get difficult fast.

Now, I just made these for Mr. Kim Chee and myself--this recipe could easily be doubled, tripled, quadrupled, etc., to suit however many guests you plan on feeding.

I love how bacon looks. Obviously other people do, too--have you seen how many bacon-related things there are out there? Bacon clothing? Plush bacon? Bacon band-aids? I've even seen bacon gum.

Anyhow. Cut your bacon in half, lengthwise.

Then cut it into small, bite-size pieces and start cooking it.

While you're waiting for your bacon, slice up a couple green onions, using the white and the light green parts. Sprinkle them daintily onto the cream cheese.

Pour in some shredded cheese, because everything is better with more cheese. I used shredded cheddar-jack but any kind of cheese you like would be fine.

Don't forget to salt and pepper!

By now, your bacon should be cooked. Drain it and then add it to the bowl. Give everything a good mix.

Now it's time for your cresent rolls. I just use regular cresent roll dough.

When you roll out your dough, you'll notice it's already pre-sliced into triangles. I wanted to make bite-size appetizers so I cut the triangles in half. You could certainly make normal-sized rolls if you wanted.

Be sure you halve the dough the long way, or you could end up with some oddly shaped roll-ups ;)

Gently spread your cream cheese mixture onto the dough.

Now it's time to roll them up! Start at the wide end and roll toward the narrow end.

Toss your little roll-ups onto a lightly greased cookie sheet and bake according to the directions on the cresent roll package.


And voila! You've got yourself a quick, easy, and delicious appetizer or side dish. Customize these roll-ups to fit you--use ham or turkey instead of bacon, swiss or smoked cheddar instead of cheddar-jack! Give them a Mediterranian or Mexican flair by changing up the spices. Whatever you do, be sure to make these for your next party. Your guests will thank you!


Recipe: Cream Cheese Cresent Roll-Ups

4 oz. cream cheese, softened
2 green onions, sliced, white and light green parts
1/2 c. shredded cheese
salt and pepper, to taste

4 slices diced bacon, cooked and drained

1 package refrigerated cresent roll dough


Combine cream cheese, green onions, shredded cheese, salt and pepper, and bacon.

Roll out cresent roll dough; cut the pre-sliced triangles in half the long way.

Carefully spread the cream cheese mixture onto the triangles.

Starting at the widest end, roll into roll-ups. Place on a greased cookie sheet and bake according to directions on the cresent roll dough.