Friday, July 29, 2011

Vanilla Confetti Cake

What's a birthday without cake? Maybe the winners of the Kim Chee Casserole First Birthday Contest will make their first batch of cupcakes with this recipe! Click the link above to enter the contest, and then leave a comment on this recipe to earn yourself an extra entry!


This recipe is basically my recipe for Tie-Dye Cupcakes with Vanilla Bean Frosting, but with a few changes. First, you make the original batter.

Like so.

Now, instead of dividing the batter into bowls and coloring it, you add a big, heaping spoonful of sprinkles.

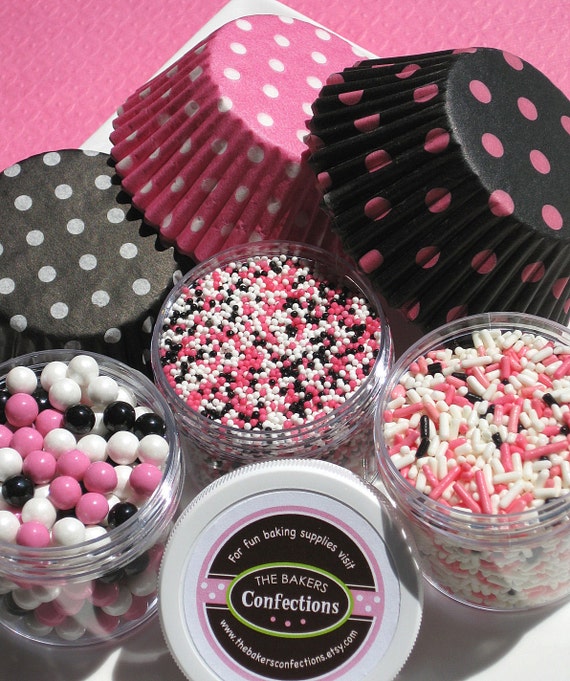
Any sprinkles will do. I like these little round guys, but those big, flat ones would probably be great, too. Color is important! You want it to be bright and happy!

Stir them in. Don't let them sit too long--I'd be afraid they would melt completely. You can see here, the colors are starting to bleed a little already.

Then the batter goes right into a greased cake pan. Or, into cupcake liners!

You know, the Diva Cupcake Kit comes with sprinkles. Think about how color coordinated you could be, with matching sprinkles and cupcake liners!

Nummy.

Let it cool completely before you frost it or you'll end up with a soggy cake with runny frosting.

The frosting uses two sticks of softened butter.

I hate how much butter gets left behind on the wrappers (and then hate scraping the wrappers off) when you leave the butter to soften on the counter. So I unwrap the butter while it's cold and let it soften in the bowl I plan on making the frosting in.

Be sure to cover the bowl if you have cats that like to jump on the counter or a kid who likes to stick her fingers in stuff!

When the butter is soft and you're about ready for frosting, grab a beater or a whisk attachment and start fluffing the fat.

Hmm. That didn't come out sounding as delicious as intended.

I like the ease of simple powdered sugar frosting, so I added some powdered sugar.

When your frosting has become nice and fluffy, you can give it some flavor. I used a bit of almond extract.

And, of course, vanilla extract is essential.

I didn't feel the need to thin my frosting out at all, but if you do, a little milk or other dairy product will do the job.

When your cake is cool, you can slap a big dollop of frosting on top.

You could eat it like this.

Or you could do the right thing and spread it around so everyone gets a little frosting on their cake.

I wanted to put more sprinkles on the top. But I didn't have any more. It was a sad day. Well, I did have Christmas and Halloween sprinkles. But this is a birthday cake!

That just means I can go on a sprinkle shopping spree, right? Next time I do a recipe involving sprinkles I'll have one of every shape, color, and kind.

You could wait until after dinner to cut a piece of cake.


Or you could cut one now. I think I'll cut one now.

For additional ways to fill your cupcake liners, check out Tie-Dye Cupcakes with Vanilla Bean Frosting and Third Trimester Chocolate Cake! And for cute cupcake ideas, check out Bakerella, Bakingdom, and of course Cake Wrecks (the cute ideas are on Sunday--the rest of the days are wrecky ;) ).


Vanilla Confetti Cake

1 c. water
1 c. (2 sticks) butter

2 c. flour
2 c. sugar
2 eggs
1/2 c. sour cream
1 tbsp. vanilla extract
1 tsp. almond extract
1 tsp. baking soda
1 tsp. salt
1 tbsp. sprinkles

Combine water and butter together in a measuring cup or microwave safe bowl, and microwave until mixture boils.

Pour the water and butter mixture into a mixing bowl. Add remaining ingredients and beat together until combined. Use a spoon or spatula to gently stir in sprinkles.

Pour batter into well-greased cake pan.

Bake at 375F for 40-50 minutes or until toothpick inserted into center of cake comes out clean.

Cool cake completely before frosting.


Recipe: Simple Cake Frosting
1 c. (2 sticks) butter, softened
1 1/2 pounds (3/4 of a regular 2 lb. bag) powdered sugar
1 tsp. vanilla extract
1/2 tsp. almond extract

Cream butter in a mixing bowl. Slowly add in powdered sugar until all sugar is combined and frosting is light and fluffy.

Add vanilla and almond extracts.

Beat until frosting has reached desired consistency.

Wednesday, July 27, 2011

Stout-Braised Short Ribs

Love cupcakes? Then enter the Kim Chee Casserole First Birthday Contest! Follow this link and leave a comment there, then come back and leave another comment here for an extra chance to win!


It's been hot here recently so I haven't done much cooking that involves long oven use. But I got some lovely short ribs in our meat package this month, and so I picked a cooler day and made myself some stout-braised short ribs.

The great thing with braising is that your prep time is relatively short, and your cook time is relatively long, but you don't have to do anything while they cook other than ... well, let them cook. And apart from that big bottle of Guinness, everything else was already in the fridge.

The first step was to chop those nice slices of bacon into pieces and cook them to render out the fat.

I am not sure why this pot looks so small. Must be the huge spoon? This is my big soup pot, but it looks much smaller!

While the bacon cooked, I cleaned and cut up my vegetables. Since they were going to be cooking for a while, I left them in rather rough chunks.

Now, the bacon was removed when it was cooked through but not crisp. It's going back in the pot anyway so it wouldn't stay crispy anyhow.

Seriously. Small-looking pot.

I set the pot of bacon fat aside for a moment while I cut my short ribs into individual ribs. You could leave them whole, but I find them a little more manageable (and in a single-serving size) by cutting them into single ribs.

They got a light dredge in seasoned flour.

Then they were carefully placed in the same pot that the bacon cooked in.

Now the pot looks big again. I just don't get it. Apparently I was having trouble with perspective when I took these pictures!

The short ribs were browned on all sides.

I didn't want to crowd the pot, so I browned my short ribs in two batches. If you have more than one batch, you may notice that your pot starts to get dry and some of the flour may start to get dark. If this happens, add a little vegetable oil or olive oil. This will keep the pan moist and help the flour from burning to your pot.

Once your short ribs are deliciously blistered on the outside, remove them and carefully put your vegetables in the pot. Stir them around to pick up all those delicious meaty bits from the bottom of the pot.

I also stirred in a spoonful of tomato paste.

I'm sure I've shared this before, but I always freeze leftover tomato paste. I find very few recipes have a need for even the smallest can of tomato paste, but I hate to throw it out, so I scrape it all out of the can and put it in a plastic bag. Then I smoosh it so it's flat, and pop it in the freezer. That way, it's easy to break off a piece of tomato paste whenever needed.

Once the vegetables are softened, I poured in the beer. Mr. Kim Chee wasn't sure how much beer to get when I asked him to pick up some stout, so he picked up one of those extra-large bottles.

The best part about that? It's the exact perfect amount of beer to make these short ribs, as well as an Eight-Ender Stout Cake. How amazing is that?

To offset the bitterness of the stout, I also added a little brown sugar.

A couple bay leaves joined the brown sugar.

A little thyme was added as well, just because thyme and braised foods are good friends.

Once all the seasonings are added, the short ribs can go back in the pot.

A can of beef broth was added, to cover the short ribs.

Oh, and don't forget to put the bacon back in, too!

That looks like the most delicious bath ever!

Then I covered the pot and placed everything in a 375F oven for about 3 hours.


When the meat begins falling off the bone, your short ribs are ready to serve! Spoon them over your starch of choice--rice, boiled potatoes, mashed potatoes, polenta, noodles, etc. I chose egg noodles because I love egg noodles (and because The Kid kept asking for noodles for dinner. Everyone wins that way!)

These are even better the next day; if you're expecting guests, make these short ribs ahead of time and simply heat them up before serving. Complete your meal with a big piece of Eight-Ender Stout Cake and you'll be the most popular hostess ever!


Recipe: Stout-Braised Short Ribs

3 strips bacon, roughly chopped

flour, for dredging
salt and pepper
3-4 lbs. short ribs, cut into individual ribs
1/2 lb. mushrooms, halved or quartered
1 onion, diced
3 carrots, cut into large chunks
2 stalks celery, cut into large chunks
5 cloves garlic
2 tbsp. tomato paste
2 c. stout
2 tbsp. brown sugar
2 bay leaves
1 tsp. thyme
1 can beef broth

In a large pot, render bacon until just cooked through. Remove and set aside.

In a shallow bowl, combine flour and salt and pepper. Lightly coat short ribs in the flour mixture, tapping off excess. Brown short ribs in the pot with the bacon fat, until short ribs are browned on all sides (do in 2 or 3 batches if necessary, to avoid crowding the pot.) Remove short ribs and set aside.

Add carrots, mushrooms, onions, celery, and garlic to the pot. Saute until slightly softened. Stir in tomato paste.

Add stout, brown sugar, bay leaves, and thyme to the pot. Stir to combine.

Carefully add short ribs back into the pot, setting them on their side (so a bone end is facing up), if possible. Add beef broth and bacon to pot.

Cover pot and place in a 375F oven. Let short ribs braise 2 1/2-3 hours until fork-tender. Serve over rice, boiled potatoes, egg noodles, or polenta.

Monday, July 25, 2011

Coq Au Can

Don't forget to enter Kim Chee Casserole's First Birthday Contest! Leave a comment there to be entered--then leave a comment for this recipe for a second chance to win!

How's this for an old-school recipe? Yet again faced with the conundrum of what to do with a whole chicken, I decided to make one of the most basic (and popular) recipes favored by BBQ chefs across America. Also called Beer Can Chicken or Beer Butt Chicken, this recipe is simple and presents great results.

The first thing I did was decide what I wanted to use to flavor the chicken. I could have used just the beer, but what's the fun in that? So I used onion, jalapeno, garlic, bay, and pepper. Everything was cut small enough to be able to fit inside the can.

We usually don't drink beer from a can. But Coq Au Can needs a can! My solution was to drink a soda, wash the can really, really well, and then fill it with beer. I also cut part of the top off, to help the beer escape the can more easily.

The flavor ingredients were placed inside the can.

Here's my beer of choice--Leinie's Red. It's a Vienna-Style Lager, very malty.

Here's where personal choice comes into play. Some folks out there in Internet land swear that you should use a flavorful lager. Others will tell you a pale ale (especially an IPA) will be ideal. A few people note that dark beers, like stouts, will produce bitter results. Still others will insist that adding the beer will do nothing at all in terms of flavor and to just use water so good beer doesn't go to waste.

Just my observation--I didn't get an overpowering flavor of beer. I do think there was a slight beer-y flavor, and the chicken was amazingly moist. But I think all the chicken we get from Painted Hill is amazingly moist. And I would have used this style beer anyway, because it's what we have in the house to drink. I wouldn't go out and specifically buy a Budweiser just for this. So do whatever you choose, it's your beer and your chicken.

Anyhow, I poured the beer into the can, nearly to the top.

Since the can already had some ingredients in it, not all the beer from the bottle fit in the can.

So I drank what was left. And maybe I opened a second bottle of beer. Just to make sure that this batch of beer was okay.

After my short break, I unwrapped the chicken and gave it a quick rinse in the sink. Then I patted it dry.

I threw it in a big plastic bag and sprinkled it generously with my BBQ Chicken Dry Rub.

Yum yum yum.

You could let your chicken marinate in the rub, or you could get it cooking right away.

When you're ready to cook the chicken, give the can a good spray-down with some cooking spray. Don't want it sticking to the chicken when it's full of hot liquid!

Pick out a nice, sturdy, flat pan for your chicken to sit in, too.

Fold the chicken's wings down so they don't burn, and then slide the chicken onto the can. Your chicken will look less like a chicken and more like a violated prisoner.

Your oven should be preheated to 350F. You'll likely have to move your oven racks around to fit an upright chicken.

Conversely, you could do the chicken on the grill. I love the way grilled chicken tastes--however, I dislike using my grill as an oven, as we have a propane tank and I'm a bit stingy with it. So I used the oven.

I cracked the oven every 15 minutes to baste the chicken. There should be plenty of liquid to baste with.

Here's what the chicken looked like after its hour of cook time.

Carefully separate the chicken from the can. You may need a kitchen helper for this. You for sure don't want to burn yourself with the hot beer.

Now it just looks like it's kicking back and relaxing.


The taste of this moist, rich chicken will haunt you so much you might have to make it again the next day. And the next. And perhaps again after that. I loved it, and so will you!


Recipe: Coq Au Can

4-5 lb. chicken, whole
4-6 tbsp. BBQ Chicken Dry Rub (recipe here)
1 can beer (or 1 bottle beer and one clean, empty can)
1 large bay leaf
2 garlic cloves
1 very small onion (or 1/4-1/5 regular onion), cut into chunks
small palmful whole peppercorns
1/3 fresh jalapeno


Wash chicken (inside and out); dry thoroughly. Rub the outside of the chicken with the dry rub. Let marinate for up to 24 hours, if desired.

Carefully cut most of the top of the can off. Empty enough beer from the can to fit bay leaf, garlic, onion pieces, peppercorns, and jalapeno.

Spray outside of can (and baking sheet) very well with nonstick spray. Fold the ends of the chicken's wings underneath themselves to prevent burning. Carefully hold the chicken upright (legs down) and insert the can into the chicken cavity. Adjust chicken and/or can to maximize stability.

Preheat oven to 350F. Arrange racks to accommodate an upright chicken. Bake chicken for 1 hour or until cooked completely. Baste entire chicken every 15 minutes with pan drippings.

Carefully separate chicken from can, discarding hot liquid. Let chicken rest 10-15 minutes before cutting.

Friday, July 22, 2011

Wow, a Year Already??

It all started with an idea and a craving for Refrigerator Pickles. 176 posts later, and we've come full circle, to the first birthday of Kim Chee Casserole! It's been a fun first year, exploring new recipes and developing tasty eats for your reading and eating enjoyment! It's been fun for me, too--having to present 3 new recipes every week has forced me to plan ahead, make time for the kitchen, and think up recipes that I haven't made before.

And what better way to celebrate a birthday than with cake? Two lucky winners will receive cupcake decorating kits!

For my male readers (and the geeky gal), I've got a Star Wars cupcake kit! Grab your cupcake pans before choosing between the Rebel Alliance or the Galactic Empire!


One lucky lady (or urban gentleman) will receive the Diva Cupcake kit, filled with colorful cupcake liners and sassy sprinkles. Just whip up some cosmos, track down a feather boa and some heels, and you've got yourself a party!


To enter the contest, all you've got to do is answer this simple question in the comments below:

What's your favorite Kim Chee Casserole recipe?

I'll make it even easier--here are some of my favorites recipes! There's a recipe from each recipe category.

Malted Waffles * Cheddar-Jalapeno Biscuits * Furiously Fast Pickles * Creamy, Cheesy Chip Dip * Curried Butternut Squash Soup * Greek Chicken * Loco Moco * Pulled Pork Sandwiches * Pasties * Seafood Risotto * Nikki's Orzo Salad * Rhubarb Buttermilk Cake * Pink-Sanded Sugar CookiesEnglish Toffee


Wait, there's a twist! Since there will be a number of KCC recipe entries between now and the time the contest ends, you can earn additional contest entries by leaving comments on other recipes too! Say I post next Wednesday. All you have to do is post a comment to the recipe posted that day, and voila! You've got yourself an extra entry! You can earn one extra entry per recipe--that's 3 extra chances to win if comment on every recipe next week!
The contest will end on Sunday, July 31 (hopefully that will give you enough time to comment on Friday's recipe). Winners will be announced on Monday, August 1. Leave an entry or two and make your friends and family happy with cake!