Showing posts with label Korean food. Show all posts

Friday, August 5, 2011

Quick (and hot!) Kim Chee


This site's been up for more than a year now, and I have yet to post a kim chee recipe!

Let me explain.

Kim chi (kimchee, kimchi, etc.) is traditionally a fermented product. It was packed into pots like this and buried in the ground.

After a few months, the pots were dug up and voila! Kim chee.

Today they have much more modern methods--you can even buy a kim chee fridge that will keep your fermenting cabbage at just the right temperature.

I'm just beginning my foray into preserving foods (some food preserving recipes to come!) and sadly, nobody in my house is that thrilled with kim chee. However, Mr. Kim Chee planted some cucumbers this year, and we find ourselves drowning in garden-fresh cucumbers. In an attempt to do something other than the typical cucumber preparations, I decided to try making a fresh kim chee from the cukes.

Here are the lucky cukes, fresh out of the garden.

Fresh cucumbers smell so much better than the ones they sell at the grocery store! And you don't have to worry about wax.

So, I washed the outsides of the cukes, and then cut them in half.

I had to cut them in half again, so they would fit in my colander.

They got a healthy sprinkling of salt, and then I left them on the counter (with a towel underneath) so some of the excess moisture could wick out. This will help the cucumbers be as crisp as possible.

See how much water leaks out? The towel underneath smelled great, like cucumber water.

The cucumbers should be allowed to weep for at least an hour, preferably two. After time is up, give each cuke a really good rinse to remove all the salt.
So, while the cucumbers were losing some water weight, I got the rest of the ingredients out.

Including the World's Biggest Garlic Clove.

Here's another deviation. Traditional kim chee is made with Korean red chiles. I can't get those locally. And strangely, there are no Asian grocery stores here. I went with what I hoped was the next best thing--Thai Chili Garlic Paste.

Basically, it's thai chili paste, with some garlic and vinegar and a couple other things. Not exactly the right ingredient, but it was as close as I could get.

Okay. To start, I peeled about an inch-long piece of ginger.

A regular spoon is a great ginger-peeling tool.

Then I minced the ginger and garlic into super fine little tiny itty bitty bits.

Next was a big spoonful of the Thai chili sauce.

You should maybe taste it before adding it. It's pretty spicy! One tablespoon-ish should probably be enough. Just a warning.

Some rice wine vinegar adds the bite these quick pickles need, as well as thin everything out so it's more like a sauce.

A dash or two of fish sauce adds a light fermented flavor, as well as that extra bite of umami that Asian people so love.

Finally, a little sprinkle of sugar and salt will add another depth of flavor. You've got hot (chili sauce), sweet (sugar), salty (salt), bitter (vinegar) and umami (fish sauce.) All the right flavors for the perfect Asian dish.

Stir everything together to make sure your ingredients are evenly distributed.

Slice your cucumbers (and half an onion) very thinly and throw them in the bowl.


Toss the cucumbers in, and you've got yourself quick kim chee! You can eat it right away, but if you wait a few hours, the flavors will meld together into a bowl of spicy, pickled cucumber deliciousness.

And don't feel limited to cucumbers! You could do this with any vegetable--cabbage, carrots, zucchini, bean sprouts--whatever you like! It's a great new (and healthy!) way to get some veggies and spice into your diet!


Recipe: Quick (and hot!) Kim Chee

2 cucumbers, halved
salt
2 cloves garlic, minced
1-inch piece of garlic, peeled and finely minced
2 tbsp. rice wine vinegar
1 tbsp. Thai chili garlic paste
1/2 tsp. fish sauce
2 tsp. sugar
light sprinkle of salt 1/2 red onion, thinly sliced  


Halve the cucumbers. Sprinkle cut sides liberally with salt; leave in a bowl or colander to drain for 1-2 hours.

In a large bowl, combine garlic, ginger, rice wine vinegar, Thai chili paste, fish sauce, sugar, and salt. Stir well to combine.

Add red onion and thinly sliced cucumbers. Toss well. Let sit for at least several hours for the best flavor.

Friday, March 4, 2011

Slow Cooked Korean Short Ribs

One of my favorite Korean dishes is kalbi--thinly sliced short ribs. This cut differs from how you usually see short ribs. They're either cut several ribs across, about half an inch thick and with several pieces of bone in them, or they're cut butterflied, like the picture on the left. And they're grilled.


We got a package of short ribs in our CSA package this month, but I was running into problems. I usually braise short ribs with red wine, but it was Sunday and we had no wine in the house. So I thought, well, I'll make them Korean style then. But we were out of propane! What to do?

Well, I wasn't letting a little detail like no propane stop me from making something good. I decided to put the crock pot in charge. It turned out to be a good decision!

The sauce for my short ribs started with a cup of soy sauce.

For sweetness, I added brown sugar and honey. I measured them both in the same measuring cup.

Sesame oil was next. Have I mentioned how much I love sesame oil? Because I do. A lot.

Three green onions (aka scallions) got added.

Then came the garlic.

I used the flat side of my knife to smash the garlic cloves. It made removing the garlic's papery coating easier. If your garlic didn't get a good enough smash the first time around, give it another one before adding it to the slow cooker.

Koreans love garlic. Don't be afraid, though--even though it's a lot, there wasn't an overpowering garlic taste. Cooking everything for so long really helps mellow the garlic bite.

I turned the crock pot on high and let the sugar and honey heat up a little. Everything got a nice layer of pepper and then was stirred together.

The short ribs came next. I placed them in horizontally. If you have as many short ribs as I did, you might need to do some cutting to get things to fit.

You'll probably have an easier time than I did. Usually short ribs purchased from the store are cut into individual ribs. These weren't, so they were a little bulkier.

After the short ribs were added, I poured in just enough water to reach halfway up the ribs. Just to keep things moist.

I also gave the ribs a good coat of ground pepper.

Let things go in the slow cooker for at least 5-6 hours at low heat. Here they are after a few hours.

Here they are, fully done. The meat should fall off the bones.


 I served mine with rice and Man Du. Give your slow cooker a break from regular Pot Roast and introduce your family to the taste of Korea!


Recipe: Slow Cooked Korean Short Ribs

1 c. soy sauce
1/8 c. packed brown sugar
1/8 c. honey
1/4 c. sesame oil
5-6 cloves garlic, smashed
3 green onions, roughly chopped
2-3 lbs. beef short ribs
pepper, for flavor
1/2 c. water

In a crock pot, combine soy sauce, brown sugar, honey, sesame oil, garlic, and green onions. Turn crock pot on low and stir well.

Add short ribs and pepper. Add enough water to go halfway up short ribs.

Cook over low heat for 5-6 hours or until beef is tender and falling off the bone. Serve over rice.

Monday, August 23, 2010

Bulgogi

Here's a Korean recipe that's quick, easy, and will appeal to even the most stubborn of midwestern meat eaters. I've altered the original recipe for bulgogi a little, to appeal to my personal tastes and cooking methods. Traditionally, bulgogi is sliced into very, very thin slices and cooked with vegetables on a hot plate or over charcoal. You wrap the hot meat in lettuce leaves along with rice, kim chee (spicy fermented vegetables, such as cabbage or radish), and hot chili paste.

Here's some bulgogi I had while in Korea last year.


Here's bulgogi at another, fancier restaurant. At this place they served it in a hot pot and it was boiled.

I'd actually asked for the kind you grill over hot coals but the language barrier didn't help in that respect. This was still really tasty.


Here are all the side dishes, called panchan, that they serve along with your meal. There are usually several types of spicy, fermented food--kim chee, spicy pickled cucumber, yams, etc. The bean sprouts are always my favorite. They're crisp and cool and served with sesame oil. You get quite a variety.
A picture I took of kim chee pots at the Korean Folk Village in Seoul.
 Traditionally kim chee (or kimchi) was made in the fall and left to ferment in the winter. The cabbage was packed into clay pots and buried in the ground. The pots are left to ferment. Today they sell kim chee refrigerators that are specifically designed for people to make their own kim chee at home.
Oops, I'm getting off track. Back to the meat.

When I make bulgogi at home, I usually skip the lettuce leaf wraps. They taste good and it's fun to wrap everything into a lettuce roll, but it's hard for our small family to go through a whole head of lettuce before it goes bad, and it seems so wasteful to throw away an entire head of lettuce at once. 

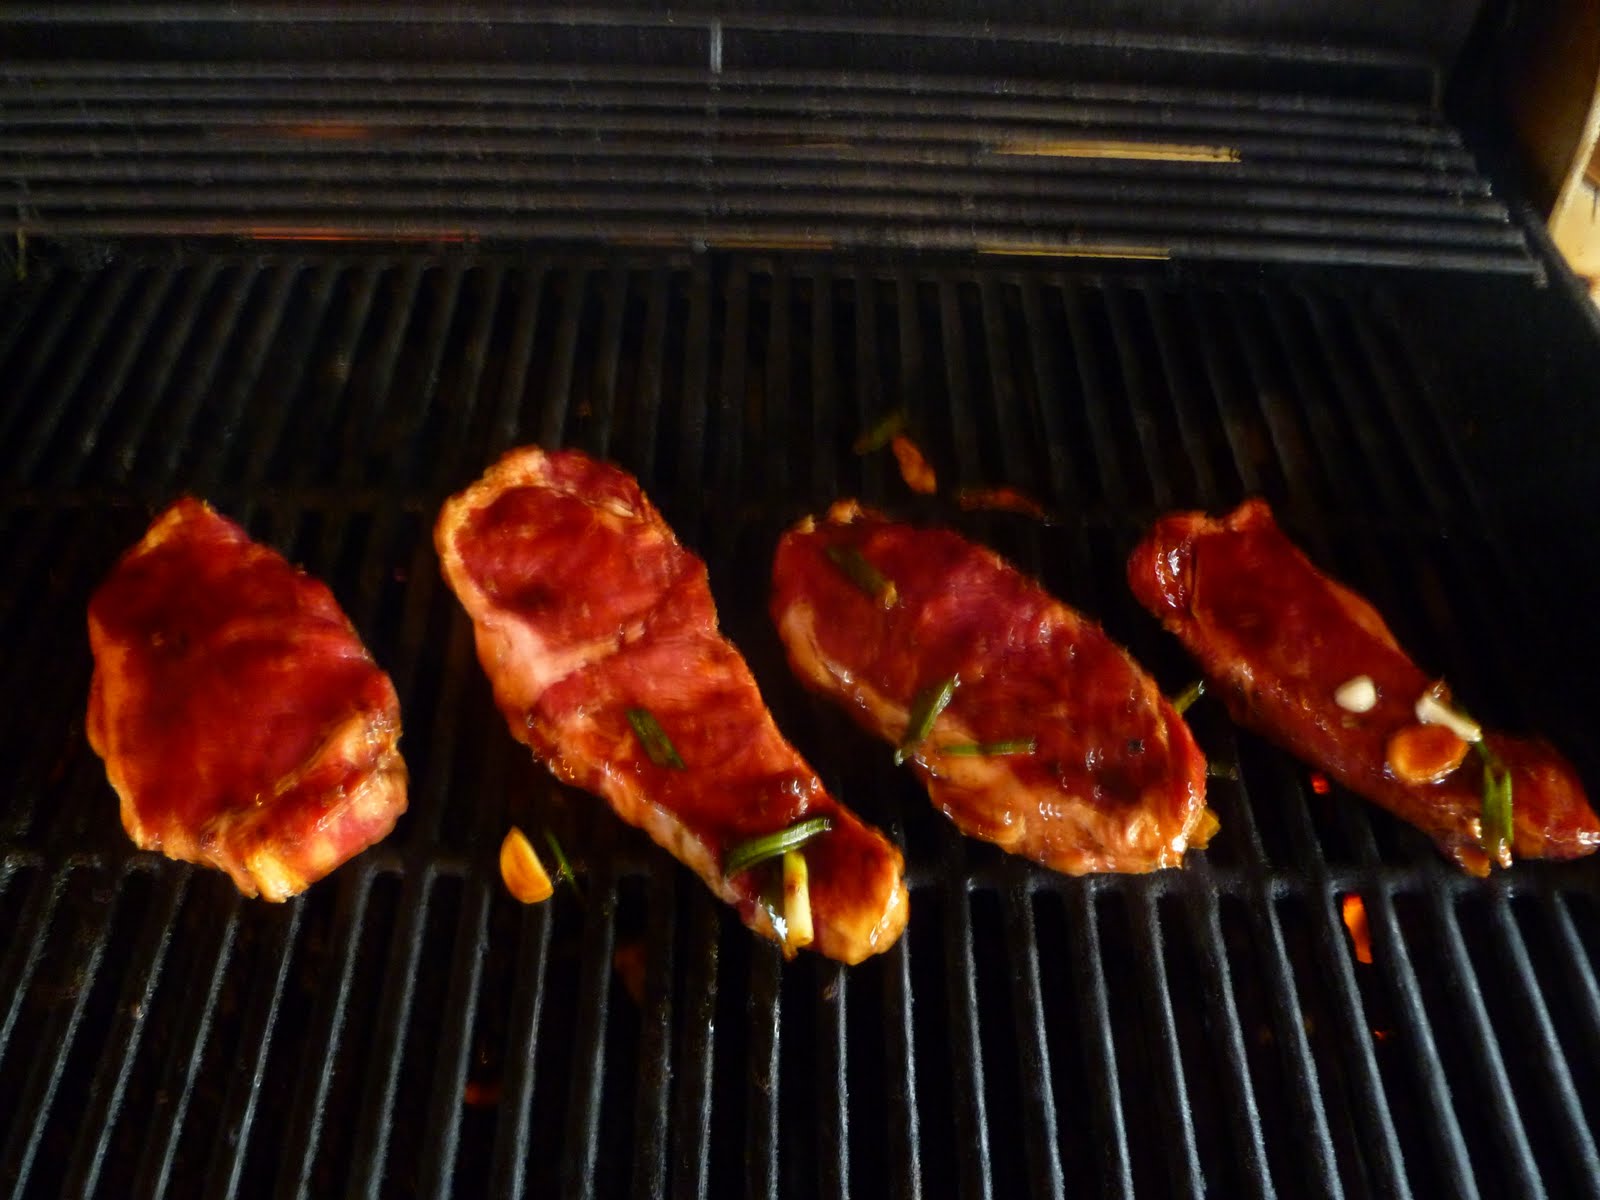
I also keep the steaks whole and cook them on the grill. I prefer the charred taste of grilled meat to meat cooked on a hot plate or on the stove, and if you slice the meat before you grill it, there's a chance of losing pieces through the grate. Instead, the steaks get sliced after they're cooked. This way, you can have your steak cooked like you like it, too. If you like rare meat, just grill it to rare.

To start the bulgogi, I make a marinade.

The Korean Teriyaki Stir-Fry sauce isn't a traditional ingredient, but I think it's a nice addition. It's very sweet, which cuts through the saltiness of the soy. The sugars also help caramelize the meat, giving it a richer flavor.
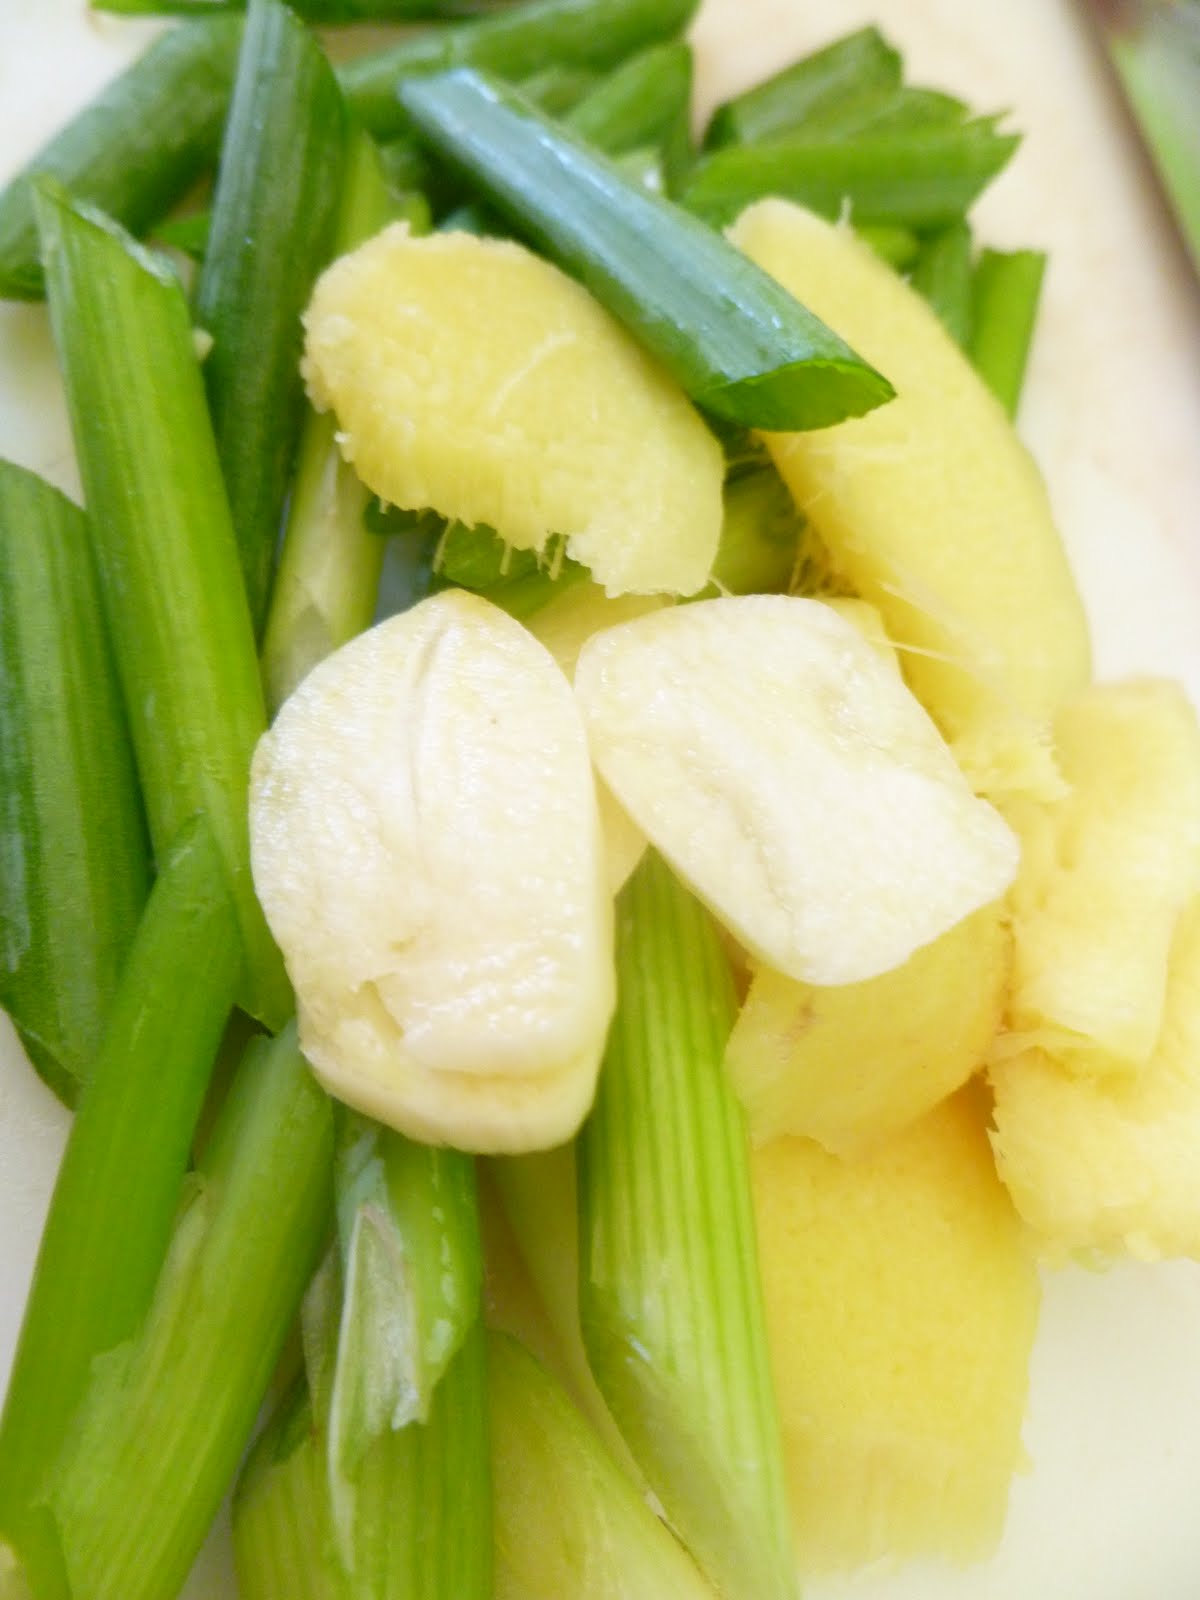
The first ingredients to take care of is the green onions, garlic, and ginger. I cut everything on a bias. This way, there's more surface area and more flavor gets extracted.

If you don't have these ingredients at your disposal, I've also been known to make the marinade with powdered spices (garlic powder, dried ginger, and onion powder.) Turns out okay. I won't tell anyone if you cheat a little.
I throw them into a plastic bag (I'm a big fan of using plastic bags to marinate--small risk of cross-contamination combined with easy clean-up!) Then I pour in the rest of my marinade ingredients.
Soy is first.
Then comes the sesame oil. I love sesame oil. I wish they made sesame oil scented candles.
Finally, in goes the stir-fry sauce. Glugglugglug.

I forgot to photograph salt and pepper. But salt and pepper. 
Then smush the bag together so everything gets mixed. And then take a big whiff. Stand there and enjoy for a minute.
Now it's time for the star of the show.

Today I'm using strip steak. My favorite cut for this is ribeye (a huge cowboy steak with the bone still in it is the ultimate treat.) Sirloin would be okay too, but the meat will be a little tougher and you'll have to be careful not to overcook it.
Into the marinade!
I shake everything up and let it hang out in the fridge. You can let this marinate a day ahead, or you can marinate as short as an hour. Either way it'll be delicious (or, as my toddler likes to say, "Nummy yummy.")
After a suitable amount of time, the steaks are ready to be grilled. I like to bring them to room temperature. This prevents your meat from shrinking and also makes sure your steak cooks evenly all the way through.
Flip!
Slice and serve over white rice. I also like to have potstickers or man du or egg rolls along with this. Something pickled is a nice accompaniment, too. If not kim chee (I know that's not everyone's favorite) than some sort of sweet pickle is nice. My husband, who isn't fond of sweet things, likes to go the opposite way and uses wasabi or sriracha sauce. Hope this becomes a favorite--it's one of mine!


Recipe: Bulgogi

4 steaks (ribeye, strip, or sirloin)

1/4 c. soy sauce
1 tbsp. sesame oil
1/4 c. Korean stir-fry sauce

2 green onions, sliced
1 fingerlong knob of ginger, sliced (you can peel it or not)
2 cloves of garlic, sliced

salt and pepper, to taste

Combine all ingredients and marinate at least an hour or as long as overnight.

Bring meat to room temperature. Grill over medium-high heat for 6-7 minutes per side.

Rest meat for 5+ minutes. Slice against the grain into thin strips. Serve over rice.

Saturday, August 14, 2010

Man Du (Fried Korean Dumplings)

Well, since this is a blog by a Korean in the midwest, I suppose it's time for a Korean recipe! These dumpings are a great way to introduce the shy eater to Korean food. Who will have the will to argue? They're fried!

When I was a kid, every summer I attended a Korean day camp that focused on Korean adoptees and their families. It was a chance for adopted kids to meet other adopted kids. We made simple Korean crafts, sang songs, tried to learn hangul, the Korean written language, learned traditional dances (if you were a girl) or tae kwon do (if you were a boy), and, the most important part, ate Korean food. These man du were the most popular dish.

Here's what you'll need. See, not too many ingredients.

The recipe does involve a lot of choppoing though. Just a warning ;)
In fact, I actually used my garlic and ginger paste instead of the fresh garlic and ginger that are pictured. If you do use the fresh, I've found that it's easiest to use a microplane and grate the garlic and ginger into the dumpling filling.
I'm getting ahead of myself. The first thing to do is start cooking your meat. You'll only need a half pound of ground pork and a half pound of ground turkey.

I like to put the meat I'm not going to use in a plastic bag and save them for spaghetti or something.
While the meat is browning, mince your onion into tiny pieces.
Do the same to a couple green onions.
Throw them into the pan with the meat.

Be sure to break up the meat into small pieces as it cooks.

Now would be a good time to add your garlic and ginger too.
While the onions are cooking along with the meat, work on chopping the next ingredient--the bean sprouts.

Some of you may be thinking, "Bean sprouts? Gross!" But really, they're an essential ingredient. They add a crunchy texture that you can't get from anything else. It's sort of the same vegetable-y crunch you get from cabbage, but...different. And they don't taste "beany" at all, I promise!

I drain all the liquid and then rinse them. Then they get a violent chop.
After you've chopped up your bean sprouts, they get thrown in with the meat. Pair them up with some thinly sliced cabbagee (I'm just using some cole slaw mix from the store.) Let everything cook together. The cabbage will wilt down quite a bit.
Splash in some soy.
Also shake in some sesame oil. I love seame oil. It makes me hungry just thinking about it.

Many recipes say to go light with the sesame oil, because it has a strong flavor. And that's true. But I always add extra sesame oil--I've personally never had a dish where I thought, "Eeew, way too much sesame oil." If you've never enjoyed the smell of sesame oil, I highly recommend it. Nothing smells so good.
Once your meat and onions have cooked, the cabbage is wilted, and the filling is seasoned, it's time to pull it off the stove. It needs to cool for a while. If you put hot filling into the wonton skins, it will stretch the skins and cause them to break while being fried.
Here are the wonton skins I used. They should be easy to find at any grocery store. You might have to do some poking around--the store I bought these at had them next to the salads and lettuce. Other times, they're in the vegetable aisle, near the herbs and tofu. Just keep looking and you should be able to track some down.
With wonton skins, it's important to keep them moist. If they dry out they'll be hard to work with.

Lay the wonton skin flat and spoon some of the filling into the center. You don't want to add too much--if you do, the wonton skin will pop and you'll have to double up on the wrappers.
Moisten the edges of the wrapper with egg. Try not to be too messy; if your work surface gets too wet then your skins will stick to it and could rip.
Fold the unmoistened corners over and gently pinch the edges together. It's also important to try to remove as much air from the filling pocket as possible. If there's too much air, the centers puff up and make it difficult to flip the man du.
At this point, you could fold the corners over to make fun shapes or decorations with your wonton. I like the simple triangle because it's fast and easy, and it yields the most surface area of fried goodness. But the options always out there.
Once you have a small arsenal of man du made, you can start frying them in batches.
When one side is golden brown, flip the man du over.
Golden brown and delicious.
Now here's what I was talking about before, in regards to adding too much filling and the wonton skin ripping. That dark spot is where the filling ripped the skin. If I were to put that in the hot oil, the filling would spill out the hole, not only depriving me of the meaty interior but also adding debris to my frying oil.
So I lightly brushed some egg over a new skin and covered the defective wonton. Good as new! It's like a giant Band-Aid!
Nothing's great like a big old pile of man du. There's that wonton that got the extra folds. He looks pretty happy to be there, I think.
Korean Man Du. Try some tonight, and add a touch of Asia to your kitchen!

Recipe: Man Du (Fried Korean Dumplings)
1/2 lb. ground pork
1/2 lb. ground turkey
1 medium onion, minced
2 green onions, white and light green parts, sliced
2 garlic cloves, minced
1 finger length knob of ginger, minced or grated
1 can bean sprouts, drained and chopped
1 c. shredded lettuce or cole slaw
1 tbsp. soy sauce
1 tbsp. sesame oil
salt and pepper, to taste

1 package small wonton skins
1 egg, beaten

oil, for frying

Cook pork and turkey with a little oil in a saute pan over medium heat. Break up large chunks.

Add onion, green onion, ginger, and garlic; stir to combine.

Add bean sprouts, and cabbage. When cabbage is wilted and onions are cooked through, remove from heat.

Add soy and sesame oil, and allow filling to cool thoroughly before constructing your man du.

Lay a wonton wrapper flat on a clean surface. Place a teaspoon's worth of filling in the center of the wrapper. Lightly brush two edges of the wonton with egg, and then fold wonton over to form a triangle. Press gently to remove any air from the center.

Fry wontons in batches in vegetable oil over medium heat. Flip over when first side is golden brown. When the whole man du is golden, remove and drain on a plate lined with newspaper or paper towels. Enjoy while hot!

PS this makes a LOT of man du. The filling freezes really, really well; I usually just put any leftover filling in a plastic container and pop it in the freezer.

I would not recommend freezing the wonton skins or making the man du ahead of time and freezing. I've had nothing but bad luck. You could try partially frying them and taking them out once the wonton is fried up enough to be firm, but I haven't tried it so can't vouch for its success. Just an FYI.