It's still summer here, and along with fresh vegetables come fresh fruits. Although peaches are yummy on their own, you can do so much more with them. They can be grilled, broiled, stewed, canned, made into jams, salsas, pies, and cakes.
And muffins. They can be made into muffins.
Muffins are so easy to make, it surprises me that people are willing to pay $4 for one. There are everyday ingredients, nothing that requires a special trip to the store, and can be made in a huge variety of flavors. And you can freeze them and eat them later! The only limitation on muffin flavors is your imagination.
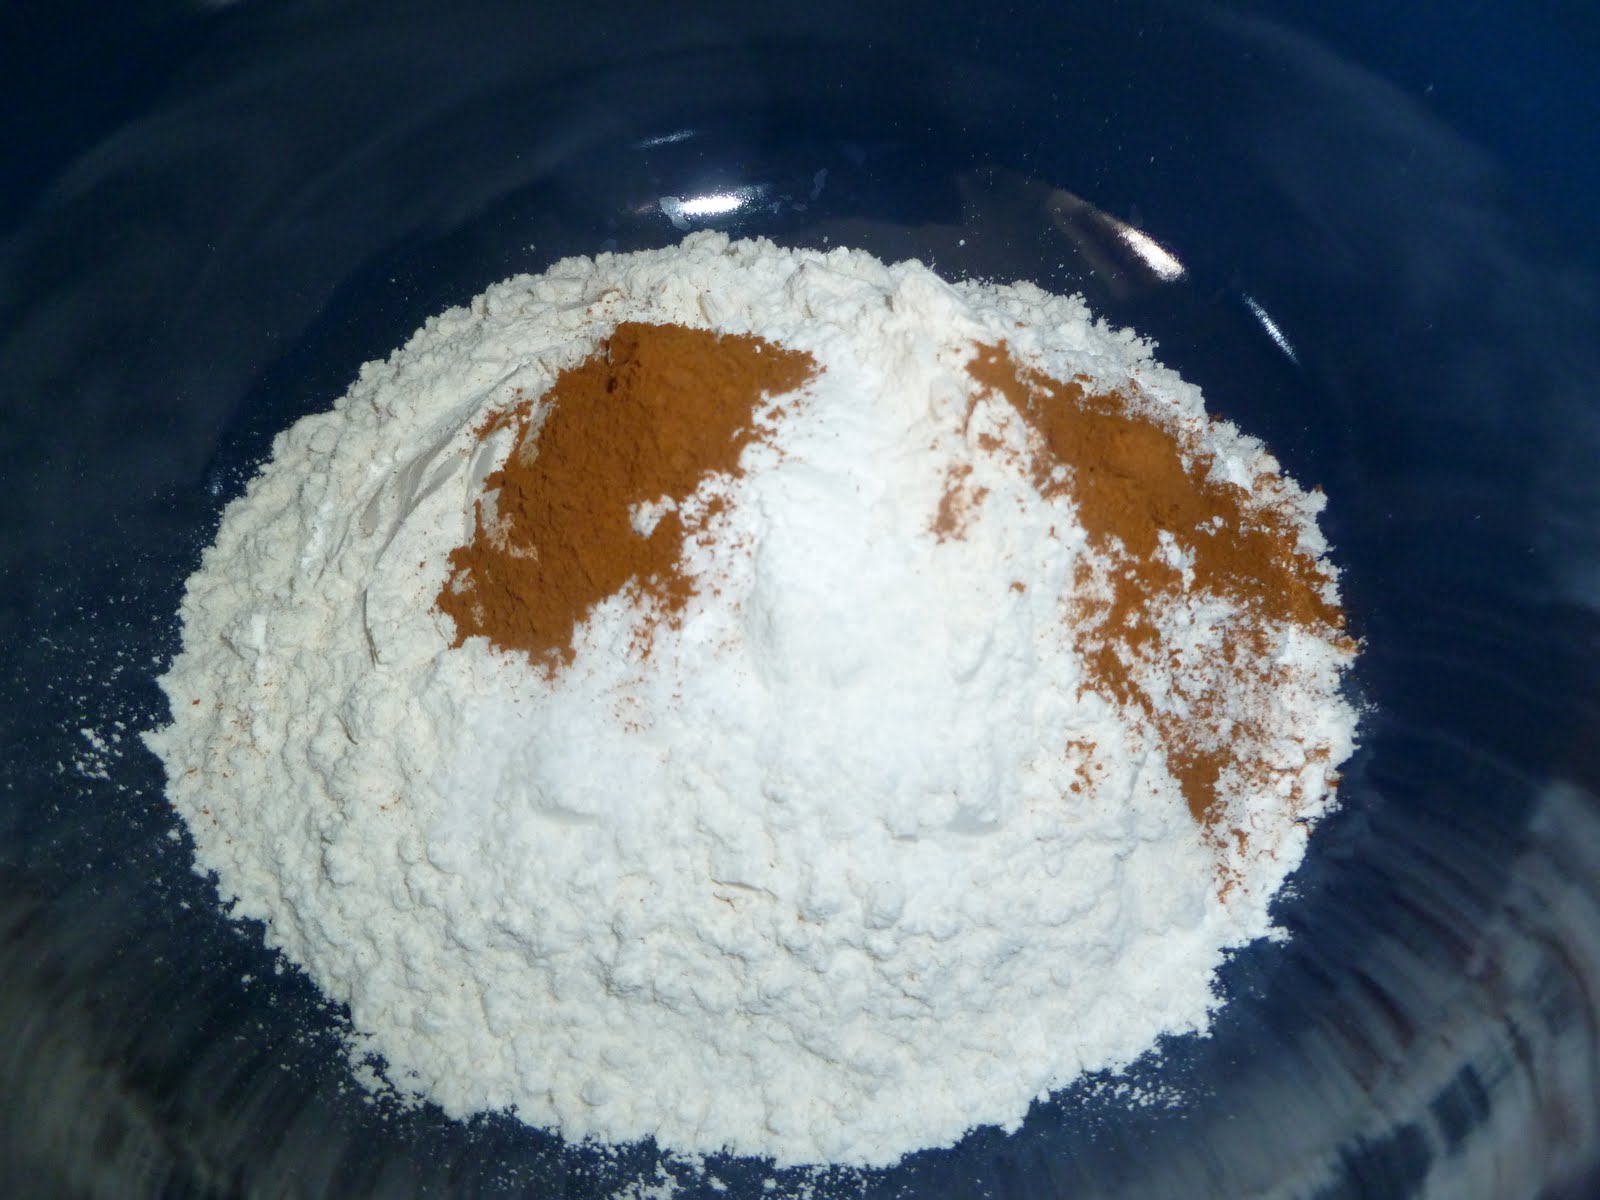
Muffins start out with a very, very white mixture of flour, baking soda, baking powder, and salt.
Add some cinnamon, to spice things up. Get it? Spice? Muffins? Ahahaha....ah.
:::cough::: Also add in a generous scoop or two of brown sugar, and then whisk everything together. I like whisking my dry ingredients--it's the lazy man's sifting.
With muffins, it's important to get the general order of things correct. You want the wet ingredients to be mixed into the dry, not the other way around. So make yourself a well in the center of your dry ingredients so it will be ready to absorb all the liquid goodness to come.
Before adding any wet ingredients, though, you'll want to get your peaches ready. I love how fresh peaches smell.
Just dice them up. I left mine on the chunkier side, but you could dice them up in smaller pieces or even mash them up.
Then melt some butter.
Add your butter into your dry ingredients. You can throw the peaches in at the same time, along with a couple of eggs.
Next is buttermilk. I love buttermilk, especially in baked goods. It keeps your quickbreads moist and gives your pancakes an extra "oomph."
Mix everything together gently until combined. I switched to a spatula at this point--I got sick of picking the pieces of peach out of the whisk. Once your batter is mixed, spoon it into greased muffin tins. I used my super jumbo muffin tin today. It made six enormous muffins.
They're a little more full than I'd like here. I went pretty heavy on the peaches. But I can deal with a little overflow. It's better than having to dirty up another muffin tin.
The thing that's going to make these muffins even better is a streusal topping. In a small bowl, combine equal amounts of brown sugar, flour, and butter.
I usually like to add some oats to this mix, too, for a little extra crunch. But apparently we were out of oats, so there are no oats today. But you could add some if you've got any. Nuts would be a nice addition, too.
I do have a pastry blender tool somewhere in my kitchen. It would be the ideal tool for making the streusal. But I haven't been able to find my pastry blender for a while. I would hazard to guess it's the consequence of living with a toddler.
So instead I just use my knife to cut the butter (and the chunks of brown sugar) into smaller chunks. By doing this, you'll get a nice, crumbly, crunchy topping.
Muffin batter done? Check. Oven preheated? Check. Streusal topping done? Check! Muffins topped with streusal? Check! Into the oven they go!
And out of the oven they come. Get a load of that topping.
These muffins are mammoth-sized. Enough to feed an army (or a household full of hungry children!) Slather them with butter or drizzle them with honey and your Monday morning blues will get a little lighter.
Recipe: Streusal-Topped Peach Muffins
2 c. flour
1 tsp. baking powder
1/2 tsp. baking soda
1 tsp. salt
1 tsp. ground cinnamon
1 stick (8 tbsp.) butter, melted
1 c. buttermilk
2 eggs
2 ripe peaches, diced
Preheat oven to 350F.
Combine dry ingredients in a large bowl; whisk to combine.
Add remaining ingredients; stir lightly to combine. Do not overmix.
Pour batter into greased muffin tins.
Make streusal topping (recipe follows) and top muffins with streusal.
Bake until toothpick inserted into the center of the muffins comes out clean. My jumbo muffins took 32 minutes (!) to finish baking. Normal sized muffins would take closer to 15-18 minutes.
Recipe: Streusal Topping
2 tbsp. cold butter
2 tbsp. brown sugar
2 tbsp. flour
Cut butter into brown sugar and flour until the mixture resembles dry crumbs. Spoon over muffin mix, then bake.
Monday, August 9, 2010
Sunday, August 8, 2010
My Favorite Thing This Week
Nature's Bounty! This time of year, there's no excuse for not getting your vegetables. Even veggie-haters should take this time to find a dish they like. It seems like everything is in season now and ready to be eaten!
The real trick with vegetables is to find out how they can be utilized best, and how YOU like them. I think the reason so many people dislike vegetables is that they don't cook them properly (overcooking seems like it's a horribly common error) and that they are forced to eat vegetables they don't love, which discolors their overall view of veggies. But it is important to try different vegetables. How else will you find out if you like or don't like something?
Take the summertime challenge--try at least three new types of vegetables that you've never had before. Or cook them in a different way than you'd normally prepare them. If you usually boil potatoes, try them on the grill. If you think you only like them fried, go beyond plain onion rings--eggplant parmesan or zucchini fries, anyone? If you usually eat them raw, try pickling them. Many firm vegetables, like carrots, cucumber, and beets, are delicious with a drizzle of vinegar. Use fresh garlic to infuse olive oil. Make a Greek salad with tomatoes, cucumbers, and a crumble of feta. If none of that appeals, then try making homemade ranch dressing!
Give it a try! Post your favorite way to prepare vegetables in the comments section to share your ideas.
Oh, and there will be a contest in a couple of weeks. Now is a great time to become a follower of the blog!
Saturday, August 7, 2010
Salted Caramel Bourbon Sauce
Caramel is one of those things that seems like it would be hard to make. But it's not! All it takes is some patience and knowing when to do which step. And when you get it right, it's ohhh so good.
Start out with a heavy saucepan that you think is too large. There will be a hot sugar mixture in here, and later we're going to add cream. The sugar is going to bubble up. You do not want it to bubble over. Cleaning hardened caramel off of your stove is not how you want to spend your evening.
Oh, and use a wooden spoon or a silicone spatula that's rated for high heats. Melted plastic doesn't taste very good, and I hear it's not good for your overall health.
You'll also want to have your ingredients ready and on standby. Caramel is a little patient, but it won't wait long enough for you to hunt through your freezer for that stick of butter you're sure you had.
Combine sugar, water, and corn syrup in your saucepan. Do not stir. Simply place on the stove over medium heat and walk away.
Once in a while, give your saucepan a swirl to mix everything together. But again, do not stir.
Stirring causes sugar crystals to form and will make your velvety caramel sauce gritty.
Here it is right after coming to a boil.
After 5 minutes.
At 10 minutes. It will smell deep and caramel-y.
After 10 minutes, take the sauce off the heat and add your cream. Remember when I said it bubbles up? Yup. Don't stand too close.
NOW you can stir. Stir, stir, stir. You'll think it won't come together, but it will. Be sure to stir deep in the corners.
Once everything is combined, throw in some butter (carefully!). Stir until the butter's melted.
Now comes the fun part (some of you are thinking, "Oh lord, she's got the Jack Daniel's out again...")
Be sure to take the pot off the heat, especially if you have a gas grill. I'm just going to guess that you like having eyebrows. I'm not saying it's going to burst into flames...but you never know. Flames + alcohol = dangerous combination.
Throw in some sea salt. I like to use this gray salt; the big granules are perfect for this kind of thing. They don't dissolve all the way so once in a while you'll get a fleck of salt mixed in with the sweet caramel.
The very last ingredient is a dash of cayenne pepper. You can add a few dashes if you're feeling brave.
Let your sauce cool. I was impatient and didn't wait very long after it was finished. That's why it looks a little thin here. It will thicken up the longer you leave it. But the corn syrup will keep it from turning into a brick.
At any rate, pour your caramel sauce over something tasty.
Like maybe some grilled peaches and pound cake? And top it off with vanilla ice cream and some toasted nuts? Yeah, I'd say your night's pretty much complete.
Or you could just eat it straight from whatever you're storing it in. It can be our little secret.
Recipe: Salted Caramel Bourbon Sauce
1 c. sugar
1/2 c. water
2 tbsp. light Karo syrup
3/4 c. heavy cream
4 tbsp. butter
1/4 c. bourbon whiskey
1 tsp. sea salt
dash of cayenne pepper
Combine sugar, water, and Karo syrup in a heavy pan. Heat over medium heat and allow to boil for 10 minutes.
Remove from heat and stir in heavy cream.
Return to heat. Add butter and stir until melted.
Add bourbon, sea salt, and cayenne pepper.
Allow sauce to cool before using.
Here's what it looks like the next day. Mmmm.
Start out with a heavy saucepan that you think is too large. There will be a hot sugar mixture in here, and later we're going to add cream. The sugar is going to bubble up. You do not want it to bubble over. Cleaning hardened caramel off of your stove is not how you want to spend your evening.
Oh, and use a wooden spoon or a silicone spatula that's rated for high heats. Melted plastic doesn't taste very good, and I hear it's not good for your overall health.
You'll also want to have your ingredients ready and on standby. Caramel is a little patient, but it won't wait long enough for you to hunt through your freezer for that stick of butter you're sure you had.
Combine sugar, water, and corn syrup in your saucepan. Do not stir. Simply place on the stove over medium heat and walk away.
Once in a while, give your saucepan a swirl to mix everything together. But again, do not stir.
Stirring causes sugar crystals to form and will make your velvety caramel sauce gritty.
Here it is right after coming to a boil.
After 5 minutes.
At 10 minutes. It will smell deep and caramel-y.
After 10 minutes, take the sauce off the heat and add your cream. Remember when I said it bubbles up? Yup. Don't stand too close.
NOW you can stir. Stir, stir, stir. You'll think it won't come together, but it will. Be sure to stir deep in the corners.
Once everything is combined, throw in some butter (carefully!). Stir until the butter's melted.
Now comes the fun part (some of you are thinking, "Oh lord, she's got the Jack Daniel's out again...")
Be sure to take the pot off the heat, especially if you have a gas grill. I'm just going to guess that you like having eyebrows. I'm not saying it's going to burst into flames...but you never know. Flames + alcohol = dangerous combination.
Throw in some sea salt. I like to use this gray salt; the big granules are perfect for this kind of thing. They don't dissolve all the way so once in a while you'll get a fleck of salt mixed in with the sweet caramel.
The very last ingredient is a dash of cayenne pepper. You can add a few dashes if you're feeling brave.
Let your sauce cool. I was impatient and didn't wait very long after it was finished. That's why it looks a little thin here. It will thicken up the longer you leave it. But the corn syrup will keep it from turning into a brick.
At any rate, pour your caramel sauce over something tasty.
Like maybe some grilled peaches and pound cake? And top it off with vanilla ice cream and some toasted nuts? Yeah, I'd say your night's pretty much complete.
Or you could just eat it straight from whatever you're storing it in. It can be our little secret.
Recipe: Salted Caramel Bourbon Sauce
1 c. sugar
1/2 c. water
2 tbsp. light Karo syrup
3/4 c. heavy cream
4 tbsp. butter
1/4 c. bourbon whiskey
1 tsp. sea salt
dash of cayenne pepper
Combine sugar, water, and Karo syrup in a heavy pan. Heat over medium heat and allow to boil for 10 minutes.
Remove from heat and stir in heavy cream.
Return to heat. Add butter and stir until melted.
Add bourbon, sea salt, and cayenne pepper.
Allow sauce to cool before using.
Here's what it looks like the next day. Mmmm.
Thursday, August 5, 2010
Pound Cake
Pound cake is such an incredibly versatile cake. It can be used as a wedding cake, as a foundation for cake artists (its density lends stability to carving in bizarre shapes), and as a simple dessert. It can be made in a round pan, a bundt pan, a muffin tin, or a loaf pan. It can stand up to frosting or simple fruit. It can be grilled or frozen. And it's so, so easy to make.
Pound cake is one of those items that I can't believe people pay $8 for a gourmet boxed mix. (My "I can't believe you paid for that" list also includes beer bread, vinaigrette, and brownies.) This recipe probably cost that much for all the ingredients combined, and is homemade. It also makes much more cake than the boxed mix. This makes enough to fill a large bundt pan--or 5-6 mini loaf pans. Once you see how easy it is to make, you'll never go back to the just-add-water powdered mixes.
The recipe starts with a combination of cream cheese, sour cream, and butter. Make sure everything is room temperature.
Whoever called celery, peppers, and onions the holy trinity was wrong.
Cream everything together. Let the mixer go for a while, so that everything is fluffy and well-incorporated. And be sure to scrape the sides. Sometimes I get lazy and don't scrape, and then I end up with chunks of cream cheese throughout the dough. Which means you have to beat the mix for like a zillion years to get rid of the chunks.
To make this even more delicious, add close to a literal ton of sugar. Again, beat it for a long time to make sure everything is nice and smooth.
Have your eggs standing by. Make sure they're room temperature, too. Look how pretty they all are.
Add the eggs one at a time, beating well after each addition.
Just going for a spin.
Add some flour to your fat-and-sugar mixture. Add it gradually so it doesn't make a big, floury mess in your kitchen. I added it in one-cup increments.
Between one of the flour additions, measure out some baking powder and toss it in to the mix.
It's all coming together. It already smells so good!
And again, don't forget to scrape your bowl!
The final two ingredients will make your good-smelling batter smell even better.
The first one is is almond extract. A little of this will go a long way, so be sure to measure carefully.
The last ingredient is good vanilla. This picture is of some homemade vanilla I made. It's just alcohol and scraped vanilla pods. I combined them and left them alone in a dark place for a few months. Those little specks are the vanilla caviar.
The alcohol I used is a mix of half vodka and half Jeremiah Weed. It was supposed to be all vodka--but then I ran out of vodka. But really any alcohol you want to use will be fine, as long as it's at least 35% alcohol. I'd maybe steer away from tequila, though ... that's just trouble. ;)
You could use regular vanilla extract too. (Not imitation, please! That stuff smells like Play-Doh. If your extract contains vanillin, that means it's artificial. You want the real stuff. Trust me.)
When you buy vanilla--or really, anything--you want the one with the smallest amount of ingredients. All you want in a vanilla extract is vanilla, alcohol, and water. Sometimes they add sugar. Nielsson-Massey is one of my favorite vanilla companies to buy from. Wait until I post a recipe with their vanilla paste in it. Ooh, heavenly.
Scoop your sweet-smelling batter into some well-greased cake pans of your choice. I usually go with mini loaf pans when I make pound cake. They're the perfect size for our small family, as well as the perfect size for gifts and for our freezer. And they're cheap. I can get 6 disposable mini loaf pans for $1.
If I'm taking the cake somewhere, I like to use my fancy bundt pan. You could also use cake rounds and frost it, like you would a normal cake. This would be beautiful as a strawberry or blueberry shortcake, with berries in the middle and frosted with whipped cream.
Just mound up the dough until you're out of batter. I don't really care if the cake top overflows a little, so used 5 mini loaf pans. If you want a prettier top, then spread the dough to 6 pans.
The top looks pretty lumpy here. But we'll fix that in a sec.
The trick to flattening out the top of your cake is to pick up the pan, hold it over the counter a couple inches, and then drop it. Do that a couple more times. This both smooths out the top of the cake as well as gets rid of any air bubbles in the batter. Air bubbles could make your cake fall and look lumpy.
Here they all are, ready to go into the oven!
And here they are an hour and 15 minutes later, ready to come out of the oven. I wish you could smell what I'm smelling.
The cakes get a nice, crisp crust, while the inside is creamy and rich.
Allow your cakes to cool, then do with them what you will. They freeze wonderfully, and only get better with age. Or take one over to your neighbor. We took some to ours and now we come home to her mowing our lawn. (Okay, it wasn't just the pound cake...but I bet it didn't hurt!)
My favorite thing to do with this pound cake is eat it with jam. I heat up my favorite jam or jelly (raspberry is devine!) so it melts, and then pour it over a piece of cake. The tartness of the raspberries goes well with the creamy sweetness of the cake. Plus, you can pretend that jam counts as a fruit and trick yourself into thinking you're eating a healthy snack ;)
Recipe: Pound Cake
2 sticks (16 tbsp.) butter, room temperature
1 8 oz. package cream cheese, room temperature
1/2 c. sour cream, room temperature
3 c. sugar
6 eggs
3 c. flour
1/2 tsp. baking powder
2 tsp. vanilla extract
1 tsp. almond extract
Cream butter, sour cream, and cream cheese together for at least 5 minutes.
While mixer is running, add sugar in one cup at a time, beating for another 5 minutes.
Add eggs one at a time, beating well after each addition.
Add flour, one cup at a time. Also toss in the baking powder.
Add extracts.
Pour into well-greased baking mechanism of your choice (bundt, cake round, muffin, loaf, mini loaf, etc.) Bake with cookie sheet underneath.
Bake at 325 for 1 hour to 1 hour 15 minutes (bake time will depend on what shape your cake is baked in.) When nearing the end of baking, insert a toothpick in the center of the cake. If it comes out clean, your cake is done. If there is cake stuck to it, it needs more time.
If you're baking in mini loaf pans or muffin tins, be sure to check the cakes in various parts of your oven. The cakes in the back might be done, but the cakes near the front might need a couple more minutes.
Cool completely and then dig in!
Pound cake is one of those items that I can't believe people pay $8 for a gourmet boxed mix. (My "I can't believe you paid for that" list also includes beer bread, vinaigrette, and brownies.) This recipe probably cost that much for all the ingredients combined, and is homemade. It also makes much more cake than the boxed mix. This makes enough to fill a large bundt pan--or 5-6 mini loaf pans. Once you see how easy it is to make, you'll never go back to the just-add-water powdered mixes.
The recipe starts with a combination of cream cheese, sour cream, and butter. Make sure everything is room temperature.
Whoever called celery, peppers, and onions the holy trinity was wrong.
Cream everything together. Let the mixer go for a while, so that everything is fluffy and well-incorporated. And be sure to scrape the sides. Sometimes I get lazy and don't scrape, and then I end up with chunks of cream cheese throughout the dough. Which means you have to beat the mix for like a zillion years to get rid of the chunks.
To make this even more delicious, add close to a literal ton of sugar. Again, beat it for a long time to make sure everything is nice and smooth.
Have your eggs standing by. Make sure they're room temperature, too. Look how pretty they all are.
Add the eggs one at a time, beating well after each addition.
Just going for a spin.
Add some flour to your fat-and-sugar mixture. Add it gradually so it doesn't make a big, floury mess in your kitchen. I added it in one-cup increments.
Between one of the flour additions, measure out some baking powder and toss it in to the mix.
It's all coming together. It already smells so good!
And again, don't forget to scrape your bowl!
The final two ingredients will make your good-smelling batter smell even better.
The first one is is almond extract. A little of this will go a long way, so be sure to measure carefully.
The alcohol I used is a mix of half vodka and half Jeremiah Weed. It was supposed to be all vodka--but then I ran out of vodka. But really any alcohol you want to use will be fine, as long as it's at least 35% alcohol. I'd maybe steer away from tequila, though ... that's just trouble. ;)
You could use regular vanilla extract too. (Not imitation, please! That stuff smells like Play-Doh. If your extract contains vanillin, that means it's artificial. You want the real stuff. Trust me.)
When you buy vanilla--or really, anything--you want the one with the smallest amount of ingredients. All you want in a vanilla extract is vanilla, alcohol, and water. Sometimes they add sugar. Nielsson-Massey is one of my favorite vanilla companies to buy from. Wait until I post a recipe with their vanilla paste in it. Ooh, heavenly.
Scoop your sweet-smelling batter into some well-greased cake pans of your choice. I usually go with mini loaf pans when I make pound cake. They're the perfect size for our small family, as well as the perfect size for gifts and for our freezer. And they're cheap. I can get 6 disposable mini loaf pans for $1.
If I'm taking the cake somewhere, I like to use my fancy bundt pan. You could also use cake rounds and frost it, like you would a normal cake. This would be beautiful as a strawberry or blueberry shortcake, with berries in the middle and frosted with whipped cream.
Just mound up the dough until you're out of batter. I don't really care if the cake top overflows a little, so used 5 mini loaf pans. If you want a prettier top, then spread the dough to 6 pans.
The top looks pretty lumpy here. But we'll fix that in a sec.
The trick to flattening out the top of your cake is to pick up the pan, hold it over the counter a couple inches, and then drop it. Do that a couple more times. This both smooths out the top of the cake as well as gets rid of any air bubbles in the batter. Air bubbles could make your cake fall and look lumpy.
Here they all are, ready to go into the oven!
And here they are an hour and 15 minutes later, ready to come out of the oven. I wish you could smell what I'm smelling.
The cakes get a nice, crisp crust, while the inside is creamy and rich.
Allow your cakes to cool, then do with them what you will. They freeze wonderfully, and only get better with age. Or take one over to your neighbor. We took some to ours and now we come home to her mowing our lawn. (Okay, it wasn't just the pound cake...but I bet it didn't hurt!)
My favorite thing to do with this pound cake is eat it with jam. I heat up my favorite jam or jelly (raspberry is devine!) so it melts, and then pour it over a piece of cake. The tartness of the raspberries goes well with the creamy sweetness of the cake. Plus, you can pretend that jam counts as a fruit and trick yourself into thinking you're eating a healthy snack ;)
Recipe: Pound Cake
2 sticks (16 tbsp.) butter, room temperature
1 8 oz. package cream cheese, room temperature
1/2 c. sour cream, room temperature
3 c. sugar
6 eggs
3 c. flour
1/2 tsp. baking powder
2 tsp. vanilla extract
1 tsp. almond extract
Cream butter, sour cream, and cream cheese together for at least 5 minutes.
While mixer is running, add sugar in one cup at a time, beating for another 5 minutes.
Add eggs one at a time, beating well after each addition.
Add flour, one cup at a time. Also toss in the baking powder.
Add extracts.
Pour into well-greased baking mechanism of your choice (bundt, cake round, muffin, loaf, mini loaf, etc.) Bake with cookie sheet underneath.
Bake at 325 for 1 hour to 1 hour 15 minutes (bake time will depend on what shape your cake is baked in.) When nearing the end of baking, insert a toothpick in the center of the cake. If it comes out clean, your cake is done. If there is cake stuck to it, it needs more time.
If you're baking in mini loaf pans or muffin tins, be sure to check the cakes in various parts of your oven. The cakes in the back might be done, but the cakes near the front might need a couple more minutes.
Cool completely and then dig in!
Subscribe to:
Posts (Atom)